How to share data between two Debox nodes?
This guide presents how to share data between two Debox nodes, further demonstrating Debox's functionality and approach to sharing data between users.
Step 1: Install Debox
See Installation section.
Install Debox on each of the nodes that will be sharing or receiving data.
If you are testing two or more Debox nodes on a single computer make sure to set different port numbers for each of the node configs.
For example:
Node 1's config would look like this:
{
  "daemon": {
    "port": 35351
  },
  "ipfs": {
    "api_port": 5001,
    "gateway_port": 8081,
    "swarm_port": 4001
  },
  "protocol": {
    "keeper_port": 32861
  },
  "webdav": {
    "port": 49181
  }
}
Node 2's config would look like this:
{
  "daemon": {
    "port": 35352
  },
  "ipfs": {
    "api_port": 5002,
    "gateway_port": 8082,
    "swarm_port": 4002
  },
  "protocol": {
    "keeper_port": 32862
  },
  "webdav": {
    "port": 49182
  }
}
Step 2: Launch Debox nodes
Launch Debox on each of the nodes that will be sharing or receiving data.
- Windows
- macOS
- Linux
-
Launch Debox daemon (accept the disclaimer when prompted)
.\debox.exeOutput:
(truncated)Daemon | Debox v0.1.0Daemon | Listening on 127.0.0.1:35350 -
Open up another terminal to execute the remaining commands
-
Intialize IPFS to provision all necessary files for the IPFS daemon
Runipfs initonly once after installationRunning
ipfs initcommand more than once will result in an error.\debox-cli.exe ipfs initOutput:
Success -
Start the IPFS daemon
.\debox-cli.exe ipfs daemon startOutput:
SuccessAccept Windows security pop-upClick
Allowfor IPFS daemon to start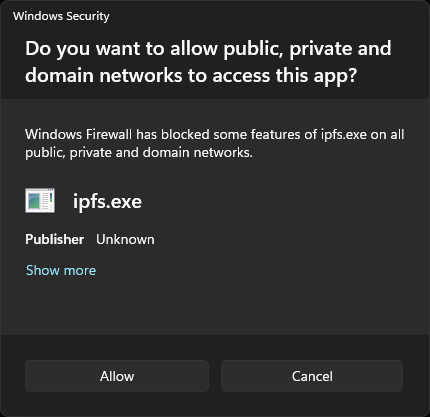
-
Start Debox Keeper
.\debox-cli.exe keeper startOutput:
SuccessAccept Windows security pop-upClick
Allowfor Debox Keeper to start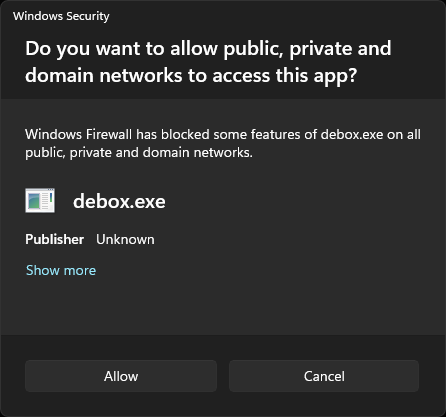
-
Launch Debox daemon (accept the disclaimer when prompted)
./deboxOutput:
(truncated)Daemon | Debox v0.1.0Daemon | Listening on 127.0.0.1:35350 -
Open up another terminal to execute the remaining commands
-
Intialize IPFS to provision all necessary files for the IPFS daemon
Runipfs initonly once after installationRunning
ipfs initcommand more than once will result in an error./debox-cli ipfs initOutput:
Success -
Start the IPFS daemon
./debox-cli ipfs daemon startOutput:
Success -
Start Debox Keeper
./debox-cli keeper startOutput:
Success
-
Launch Debox daemon (accept the disclaimer when prompted)
./deboxOutput:
(truncated)Daemon | Debox v0.1.0Daemon | Listening on 127.0.0.1:35350 -
Open up another terminal to execute the remaining commands
-
Intialize IPFS to provision all necessary files for the IPFS daemon
Runipfs initonly once after installationRunning
ipfs initcommand more than once will result in an error./debox-cli ipfs initOutput:
Success -
Start the IPFS daemon
./debox-cli ipfs daemon startOutput:
Success -
Start Debox Keeper
./debox-cli keeper startOutput:
Success
Step 3: Prepare Data for Sharing (Node 1)
- Windows
- macOS
- Linux
-
Create a directory in DeboxFS (using
demo-testin this example).\debox-cli.exe fs mkdir /demo-testOutput:
Success -
Create a test file or select any file that you would like to share (creating a test file for example)
echo -
Add the file to your local DeboxFS
.\debox-cli.exe fs add \path\to\debox.txt /demo-test/debox.txtOutput:
Success -
List files in DeboxFS to ensure that the file was added
.\debox-cli.exe fs ls /demo-testOutput:
Name Size Date created Date modifieddebox.txt F 13 2024-02-19 16:48:19 2024-02-19 16:48:19 -
Create a Debox Share for the
/demo-testfolder.\debox-cli.exe share create /demo-testOutput:
Share ID (SID) Path3diYHJwUzzj1BDnvyUen3aQi5nySvxXmi8KesBtkewBz /test -
List all Shares to see newly created Share (optional)
./debox-cli share lsOutput:
Share ID (SID) Path3diYHJwUzzj1BDnvyUen3aQi5nySvxXmi8KesBtkewBz /test -
Sync the newly created Share so that its contents can be shared
.\debox-cli.exe share sync 3diYHJwUzzj1BDnvyUen3aQi5nySvxXmi8KesBtkewBzOutput:
Pull events:No dataPush events:MODIFIED: 2024-02-19 16:48:19 debox.txt 13 ljMnEGmz Qme1oistKpzditFWdwUfvkrwHUVLdbf74uMrirtC7meCaV -
Create an Invite to your newly created Share using the Share ID. The created Invite will need to be sent via any secure channel to the party that you are intending to grant access to this newly created Share.
.\debox-cli.exe invite create 3diYHJwUzzj1BDnvyUen3aQi5nySvxXmi8KesBtkewBzOutput:
New Invite:G5Sacrg7CiwV17ueL2e2P1krBJzw3CSzBg2JLAnmhxnTp7NLWorK9B4MS6a86Jh1RnYboBws7J9VxpCDpvQv4jCxUezG9aKin2BhVMA9WCLyouhFndMCd2yJkYy9icyYKLHZwD9kPcL8zAzyjAvMFv7Xcwo4PUNebdgcZDYyRWx9mE2awNhBwawcE8WR
-
Create a directory in DeboxFS (using
demo-testin this example)./debox-cli fs mkdir /demo-testOutput:
Success -
Create a test file or select any file that you would like to share (creating a test file for example)
echo "Hello Debox" > debox.txt -
Add the file to your local DeboxFS
./debox-cli fs add /path/to/debox.txt /demo-test/debox.txtOutput:
Success -
List files in DeboxFS to ensure that the file was added
./debox-cli fs ls /demo-testOutput:
Name Size Date created Date modifieddebox.txt F 13 2024-02-19 16:48:19 2024-02-19 16:48:19 -
Create a Debox Share for the
/demo-testfolder./debox-cli share create /demo-testOutput:
Share ID (SID) Path3diYHJwUzzj1BDnvyUen3aQi5nySvxXmi8KesBtkewBz /test -
List all Shares to see newly created Share (optional)
./debox-cli share lsOutput:
Share ID (SID) Path3diYHJwUzzj1BDnvyUen3aQi5nySvxXmi8KesBtkewBz /test -
Sync the newly created Share so that its contents can be shared
./debox-cli share sync 3diYHJwUzzj1BDnvyUen3aQi5nySvxXmi8KesBtkewBzOutput:
Pull events:No dataPush events:MODIFIED: 2024-02-19 16:48:19 debox.txt 13 ljMnEGmz Qme1oistKpzditFWdwUfvkrwHUVLdbf74uMrirtC7meCaV -
Create an Invite to your newly created Share using the Share ID. The created Invite will need to be sent via any secure channel to the party that you are intending to grant access to this newly created Share.
./debox-cli invite create 3diYHJwUzzj1BDnvyUen3aQi5nySvxXmi8KesBtkewBzOutput:
New Invite:G5Sacrg7CiwV17ueL2e2P1krBJzw3CSzBg2JLAnmhxnTp7NLWorK9B4MS6a86Jh1RnYboBws7J9VxpCDpvQv4jCxUezG9aKin2BhVMA9WCLyouhFndMCd2yJkYy9icyYKLHZwD9kPcL8zAzyjAvMFv7Xcwo4PUNebdgcZDYyRWx9mE2awNhBwawcE8WR
Step 3: Requesting Access (Node 2)
- Windows
- macOS
- Linux
-
Use the received Invite to create a Pass to request access to Node 1's Share
.\debox-cli.exe pass create G5Sacrg7CiwV17ueL2e2P1krBJzw3CSzBg2JLAnmhxnTp7NLWorK9B4MS6a86Jh1RnYboBws7J9VxpCDpvQv4jCxUezG9aKin2BhVMA9WCLyouhFndMCd2yJkYy9icyYKLHZwD9kPcL8zAzyjAvMFv7Xcwo4PUNebdgcZDYyRWx9mE2awNhBwawcE8WROutput:
Pass ID (PID)MD5Ny74Qkskgeb3QZDmAmzbCTcNeaEi4cfL1wp9GkgJ -
List the newly created Pass (the pass will be pending until Node 1 accepts it to grant access to the Share) (optional)
.\debox-cli.exe pass pendingOutput:
Pass ID (PID)MD5Ny74Qkskgeb3QZDmAmzbCTcNeaEi4cfL1wp9GkgJ
-
Use the received Invite to create a Pass to request access to Node 1's Share
./debox-cli pass create G5Sacrg7CiwV17ueL2e2P1krBJzw3CSzBg2JLAnmhxnTp7NLWorK9B4MS6a86Jh1RnYboBws7J9VxpCDpvQv4jCxUezG9aKin2BhVMA9WCLyouhFndMCd2yJkYy9icyYKLHZwD9kPcL8zAzyjAvMFv7Xcwo4PUNebdgcZDYyRWx9mE2awNhBwawcE8WROutput:
Pass ID (PID)MD5Ny74Qkskgeb3QZDmAmzbCTcNeaEi4cfL1wp9GkgJ -
List the newly created Pass (the Pass will be pending until Node 1 accepts it to grant access to the Share) (optional)
./debox-cli pass pendingOutput:
Pass ID (PID)MD5Ny74Qkskgeb3QZDmAmzbCTcNeaEi4cfL1wp9GkgJ
Step 4: Granting Access (Node 1)
- Windows
- macOS
- Linux
-
List the pending Passes, requesting access to the earlier created Share. (There should be one from Node 2.)
.\debox-cli.exe pass ls 3diYHJwUzzj1BDnvyUen3aQi5nySvxXmi8KesBtkewBzOutput:
Pass ID (PID) Name MessageMD5Ny74Qkskgeb3QZDmAmzbCTcNeaEi4cfL1wp9GkgJ - - -
Accept the Pass to grant access to Node 2.
.\debox-cli.exe pass accept 3diYHJwUzzj1BDnvyUen3aQi5nySvxXmi8KesBtkewBz MD5Ny74Qkskgeb3QZDmAmzbCTcNeaEi4cfL1wp9GkgJOutput:
Success
-
List the pending Passes, requesting access to the earlier created Share. (There should be one from Node 2.)
./debox-cli pass ls 3diYHJwUzzj1BDnvyUen3aQi5nySvxXmi8KesBtkewBzOutput:
Pass ID (PID) Name MessageMD5Ny74Qkskgeb3QZDmAmzbCTcNeaEi4cfL1wp9GkgJ - - -
Accept the Pass to grant access to Node 2.
./debox-cli pass accept 3diYHJwUzzj1BDnvyUen3aQi5nySvxXmi8KesBtkewBz MD5Ny74Qkskgeb3QZDmAmzbCTcNeaEi4cfL1wp9GkgJOutput:
Success
Step 5: Retrieving Share Contents (Node 2)
- Windows
- macOS
- Linux
-
After Node 1 has accepted Node 2's requested Pass, Node 2 can join Node 1's Share using that Pass
.\debox-cli.exe pass join MD5Ny74Qkskgeb3QZDmAmzbCTcNeaEi4cfL1wp9GkgJOutput:
Share ID (SID) Path3diYHJwUzzj1BDnvyUen3aQi5nySvxXmi8KesBtkewBz /test -
Sync the Share contents for local access to the Share data
.\debox-cli.exe share sync 3diYHJwUzzj1BDnvyUen3aQi5nySvxXmi8KesBtkewBzOutput:
Pull events:MODIFIED: 2024-02-19 16:48:19 debox.txt 13 ljMnEGmz Qme1oistKpzditFWdwUfvkrwHUVLdbf74uMrirtC7meCaVPush events:No data -
List the Share contents to view the received data
.\debox-cli.exe fs ls /demo-testOutput:
Name Size Date created Date modifieddebox.txt F 13 2024-02-19 16:48:19 2024-02-19 16:48:19using webdavThe contents of the share can be viewed via your file explorer (See WebDAV)
-
Transfer the contents to your local filesystem
.\debox-cli.exe fs get /demo-test/debox.txt /local/path/to/debox.txtOutput:
Success -
View the contents of the retrieved file
cat \local\path\to\debox.txtOutput:
Hello, Debox!
-
After Node 1 has accepted Node 2's requested Pass, Node 2 can join Node 1's Share using that Pass
./debox-cli pass join MD5Ny74Qkskgeb3QZDmAmzbCTcNeaEi4cfL1wp9GkgJOutput:
Share ID (SID) Path3diYHJwUzzj1BDnvyUen3aQi5nySvxXmi8KesBtkewBz /test -
Sync the Share contents for local access to the Share data
./debox-cli share sync 3diYHJwUzzj1BDnvyUen3aQi5nySvxXmi8KesBtkewBzOutput:
Pull events:MODIFIED: 2024-02-19 16:48:19 debox.txt 13 ljMnEGmz Qme1oistKpzditFWdwUfvkrwHUVLdbf74uMrirtC7meCaVPush events:No data -
List the Share contents to view the received data
./debox-cli fs ls /demo-testOutput:
Name Size Date created Date modifieddebox.txt F 13 2024-02-19 16:48:19 2024-02-19 16:48:19 -
Transfer the contents to your local filesystem (can also be done via WebDAV)
./debox-cli fs get /demo-test/debox.txt /local/path/to/debox.txtOutput:
Success -
View the contents of the retrieved file
cat /local/path/to/debox.txtOutput:
Hello, Debox!